If you have just received your Spectra S1 and S2 breast pump, it can be a little intimidating. There are a lot of settings and pump parts. Here is the ultimate guide to help you with with how to use your Spectra S2 and S1 pump.
Here is a bunch of useful information on how to assemble the Spectra pump parts and tips on settings to use with the Spectra pump.
After using this pump for a year, I have gathered all the best tips for you to help you with using your Spectra breast pump!
Steps To Use A Spectra Breast Pump:
- Assemble the backflow protector.
- Connect the tubing to the pump.
- Connect the other end of the tubing to the backflow protector.
- Assemble the breast shield, duckbill valve, and bottle.
- Connect the breast shield to the backflow protector.
- Start in Let Down Mode with cycle 70.
- After milk starts flowing, switch to Expression Mode in cycle 54.
- Continue pumping for 15 to 25 minutes until empty.
These are the high-level steps to get you started pumping. However, you may be wondering what do I do with these settings? What do cycle and level mean?
Below are a lot more details for you with:
- How to assemble the pieces
- An explanation on how the buttons and settings work, and
- Tips on using the Spectra pump to double pump and power pump
(Also, be sure to read all the way to the end where I have 2 special FREEBIES for my readers – worth $85 total!)
If you haven’t heard the news, in addition to the Spectra S1 and S2, Spectra has a new pump called the Spectra Synergy Gold (Spectra SG). Check out all the details on this pump here.
What Is the Difference Between The Spectra S1 and S2 Breast Pumps?
There are three main differences between the Spectra S1 and S2 breast pumps.
- The Spectra S1 pump is blue and the Spectra S2 pump is pink.
- The Spectra S1 has a built-in battery pack and the S2 does not.
- The Spectra S1 generally costs more than the Spectra S2 because of the built-in battery.
The battery pack on the Spectra S1 means that the pump can be charged. Then, you can use the S1 pump without it being plugged into the wall.
The Spectra S2 pump does not have this built-in battery pack, and the S2 needs to be plugged into the wall for power.
You can check out the current price of the Spectra S1 here (link to Amazon).
The current price of the Spectra S2 is here (link to Amazon).
The color of the S1 and S2 pumps is just cosmetic and it does not impact the functionality. The way that you assemble the pumps and use the settings on the two pumps is also the same.
All of the advice in this article is applicable for both the Spectra S1 and S2 pumps.
NEXT Read: 3 Genius Tips To Make a Spectra S2 Pump Portable
Steps To Use The Spectra S1 and S2 pumps
The steps to using the Spectra pumps include assembling the pump parts, and then understanding how to use the settings on the pump.
Step 1: Assemble The Backflow Protector On The Spectra S1/S2 Pump
Start by assembling the backflow protector. There are three pieces for the backflow protector. A white silicone piece and two clear plastic pieces.
Put the white silicone piece on the clear plastic piece. Then, snap the second clear plastic piece over the other side of the white silicone piece.
The white silicone piece should be in between the two clear plastic pieces. The larger nub on the backflow protector will connect into the Spectra breast shield.
The nub that is smaller will fit into the tubing that connects to the pump.
The backflow protector prevents any milk from flowing from the breast shield into the pump. The plastic pieces and silicone pieces create a barrier between the breast shield and the tubing.
This backflow protector is what makes the Spectra S1 and S2 pumps a closed system. The backflow protector prevents the milk from flowing into the pump, which ensures that the pump stays clean and sanitary.
It prevents mold growth in the tubing and breast pump motor.
Step 2: Connect The Tubing To The Spectra S1/S2 Pump
There are two pieces of tubing that come with your pump accessory kit. If you are double pumping, you will use both pieces of tubing.
Double pumping means that you will pump both breasts at the same time.
If you are single pumping, then you will only need to use one piece of tubing.
Single pumping means that you will only pump one breast at a time.
In order to double pump, remove the small white cap from the pump. Connect one end of the tubing to the pump. Do the same with the second piece of tubing.
Pro Tip: The tubing can become loose over time as you use the pump. If the tubing disconnects from the pump during the middle of your pumping session, it is time to replace the tubing.
When I used the standard Spectra tubing, it was so frustrating when the tubing would become lose during the middle of my pumping session.
I went on the search for better pump tubing for my Spectra pump, and I ended up finding an unusual solution that works perfectly.
I prefer to use this tubing instead of the standard Spectra tubing that came with my pump (link to Amazon).
I love that I can cut it to any length that is convenient for me (because the standard tubing always seemed too short). As a bonus, this tubing is very inexpensive.
When attaching the tubing to the pump, this tubing was much less likely to eventually disconnect from the pump.
It ended up working so much better for me than the standard tubing that came with the Spectra pump.
Watch the video below for great tips on using your Spectra pump!
Step 3: Connect The Other End Of The Tubing To The Backflow Protector
The next step is to connect the other end of the pump tubing to the backflow protector. The other end will fit into the small nub on the Spectra backflow protector.
If you are double pumping, go ahead and attach each tube onto a backflow protector.
The backflow protector has two sides, a small nub and a large nub. If you are having trouble connecting the tubing, double check that you are trying to attach the tubing to the end with the small nub.
The tubing will not fit easily onto the large nub of the backflow protector.
When you are pumping, you should not see any milk in the Spectra pump tubing. If you start to get milk in the pump tubing, stop pumping.
Inspect the pump pieces and ensure that they are all fitting together properly.
Step 4: Assemble The Breast Shield, Duckbill Valve, and Bottle
The next step is to assemble the breast shield, duckbill valve, and bottle. First, twist the duckbill valve onto the opening on the breast shield. Next, twist the bottle onto the breast shield.
If you are double pumping, then repeat the steps so you have two full set-ups.
The duckbill valve is one of the most important parts of the set-up. It will drive the amount of suction on your pump.
The duckbill valve needs to be replaced frequently, usually every 2 to 4 weeks.
Over time the duckbill valve will become loose and worn out from using your pump and from washing and sterilizing your pump parts.
Once it becomes loose, you may notice a gradual decline in the amount of milk you pump during each session.
Pro Tip: You can pump into Avent bottles instead of the bottles that came with the Spectra pump. The Avent bottles fit perfectly and screw onto Spectra flanges without an adapter.
The main reasons I preferred Avent bottles over Spectra bottles were:
- The measurements on the Spectra bottles were difficult to read
- The measurements seemed inaccurate compared to other bottles
- The Spectra bottles tipped and did not feel stable when they were full of milk
- Avent bottles came in larger sizes, and I could pump into these bottles without needing to switch bottles in the middle of my pumping session.
Here is a link to the bottles that fit directly with the Spectra pump.
Also, be sure to check out the caps for the bottles so you can safely store your milk in the refrigerator and transport it.
As a bonus, you can even write the date on the cap to keep your milk organized. These are the caps that I found which work the best.
Step 5: Connect The Spectra Brest Shield To the Backflow Protector
The next step is to connect the breast shield to the backflow protector. One end of the backflow protector is already connected to the tubing.
Take the other end and insert it into the Spectra breast shield. It should fit snugly.
Now, all the pieces of your pump should be set up and ready to go.
Plug the power cord into the wall. The other end goes in the small hole on the side of the Spectra pump. Now, you are ready to start pumping!
If you would like to test your pump at this point, go ahead and turn it on.
Try testing out your pump before you put on the flanges. You should be able to see the white silicone piece in the backflow protector. It will pulse in and out due to the air pressure from the pump.
Step 6: Start Pumping In Let Down Mode With Cycle 70
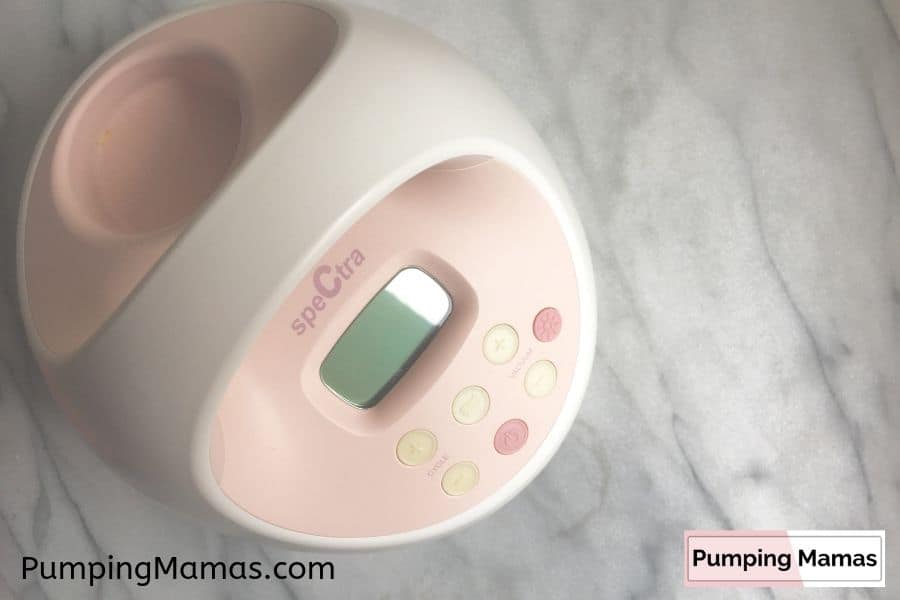
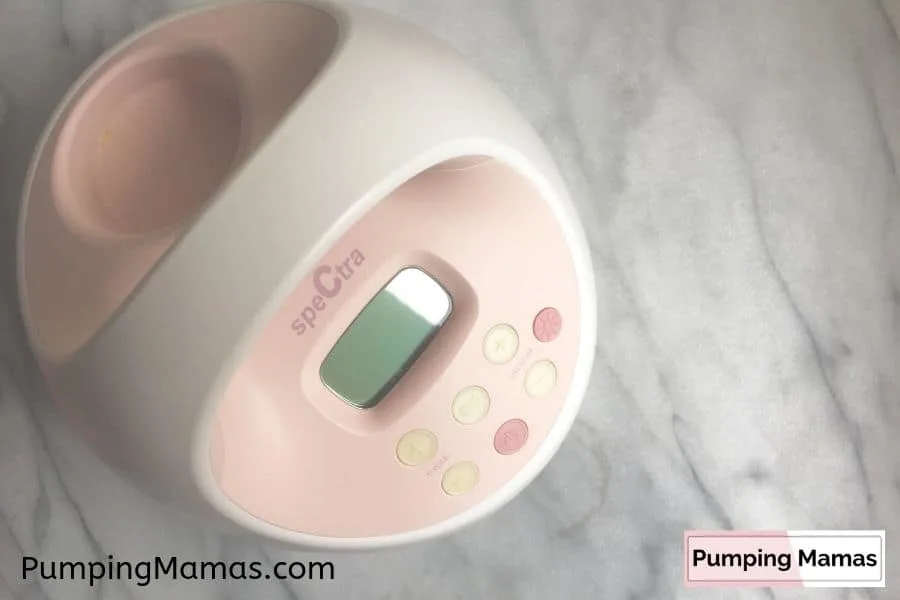
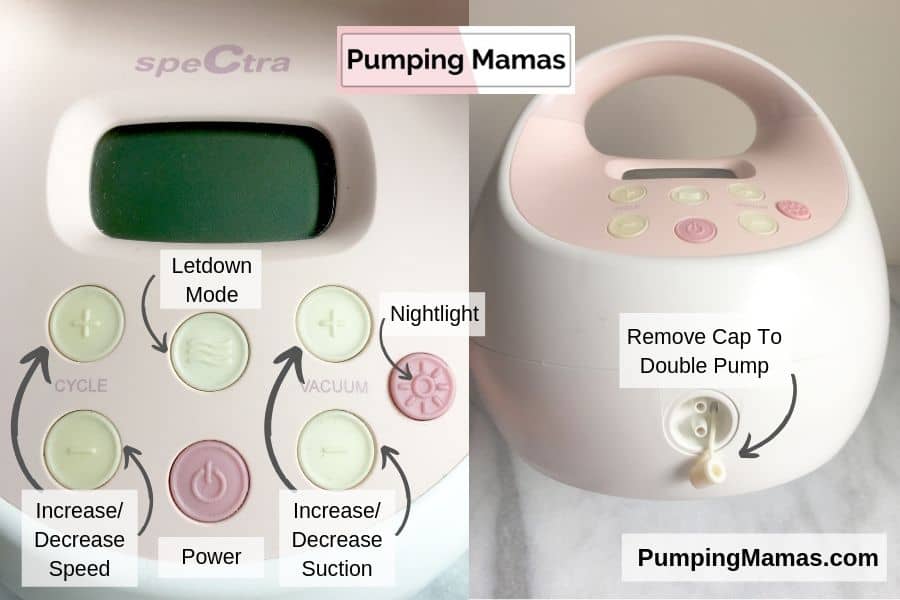
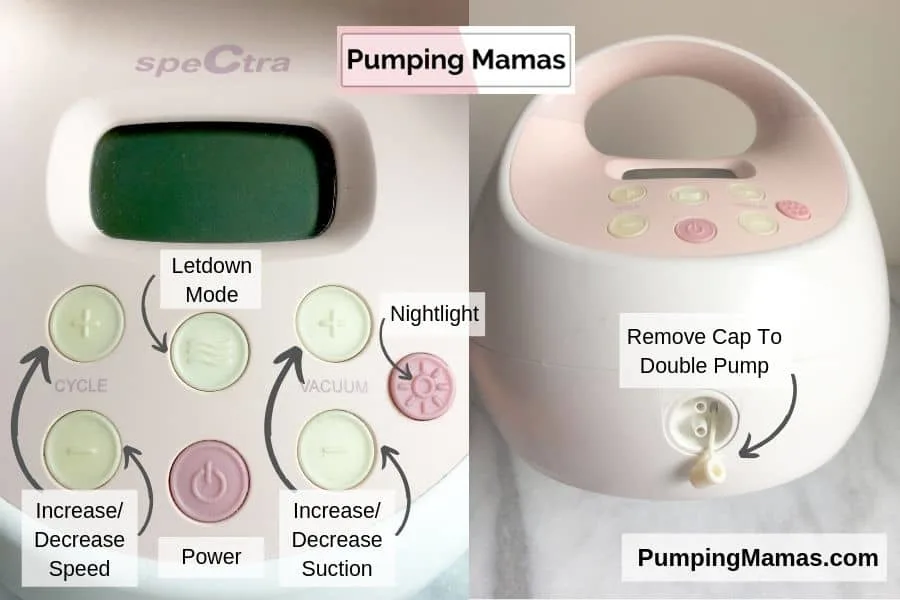
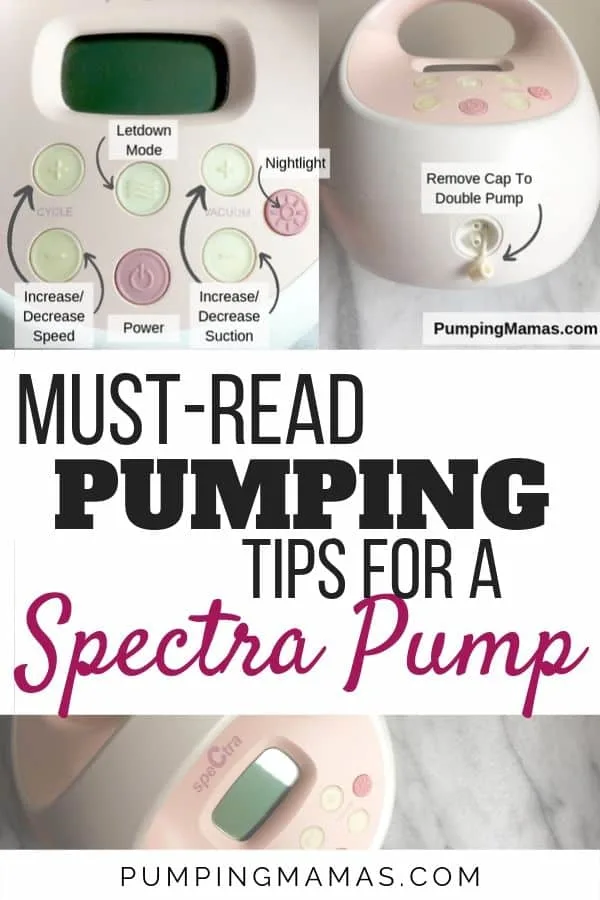
To start pumping, turn on the pump by pressing the power button. This is the button in the center. It has a circle and a hash mark on it.
Next, you will want to start off by pumping in let down mode.
This is the button in the center with wavy lines. Push this button. The cycle on the digital display will show “70”.
The level of suction can be adjusted to your comfort. The lowest level of suction is 1 and the highest on cycle 70 is level 5.
Start off with level 1 and increase the suction until you are uncomfortable. Once it is uncomfortable, then go back down a level.
Cycle 70 and level 4 was usually the most comfortable for me while in let down mode.
This may vary depending on how engorged you are. After you have been pumping for a few weeks or months, you may find that you are more comfortable using a higher level of suction while pumping.
Pro Tip: A hands-free pumping bra is definitely a must-have item. It will allow you to multitask while pumping. By not needing to hold the breast shields, your hands will also be free to massage, which can help you to get more milk. As a busy mom, your time is precious.
I found that not every pumping bra works well with Spectra. This is because some bras are designed for the Medela flanges which come in two pieces.
This is the pumping bra that works the best with Spectra flanges. It is also easily adjustable. It works great because it allows you to use flanges that are already assembled in one-piece.
If you’re interested in this pumping bra, you might want to also check it out here on their site to compare for the best price.
Step 7: After Milk Starts Flowing, Switch To Expression Mode
Once you start to see or feel that your milk is flowing, switch to expression mode, such as cycle 54.
This mode is a slightly slower pump speed. When the speed decreases, you want to increase the level of suction.
You can switch to this cycle speed by pressing the button with the wavy lines. Then, press the plus or minus buttons to get to cycle 54.
The next thing you will want to select is the vacuum level of suction. During expression mode, the level of suction can be increased all the way up to level 12.
You may want to start with level 5 and increase it until it is a little too painful.
Then, decrease the level back down one setting until you are comfortable again.
Stay at this speed and vacuum level until milk stops flowing. After it stops flowing, switch back to let down mode by pressing the button with wavy lines.
For more info on Spectra Pump Settings, check out the full guide here. There are 4 options for pump settings depending on your individual situation.
Step 8: Continue Pumping For 15 To 25 Minutes Until Empty
You will want to go ahead and pump for a total of at least 15 to 25 minutes. If milk stops flowing, try switching back to the letdown mode / cycle 70.
As the cycle decreases in speed, you will want to increase the vacuum level of suction to maximize the amount of milk you are able to pump.
For example, if you are in cycle 70, you may pump at level 4. In cycle 54, you may pump at level 6. Furthermore, when using cycle 46, you may pump at level 8.
This mimics how a baby would suck if directly nursing. Initially, a baby will start at a fast speed. After milk starts flowing, the baby will transition to slow, strong sucks to draw all of the milk out.
Tip: Be sure to Save this article on Pinterest to your Baby or Breastfeeding board so you can find it later!
Keep reading for more info on Spectra Pump Settings and other great Spectra tips!

Sample Pump Settings For Spectra Pumps
Here is a sample of settings you can use while pumping with the Spectra, and the amount of time to spend pumping at each setting. These settings are for a 25-minute pumping session.
| Minute(s) | Cycle | Vacuum Level |
|
1 |
70 |
2 to 3 |
|
1 |
70 |
4 to 5 |
|
8 |
54 |
5 to 8 |
|
2 |
70 |
4 to 5 |
|
8 |
50 |
6 to 10 |
|
2 |
70 |
4 to 5 |
|
3 |
46 |
8 to 12 |
If you feel that the suction is not strong enough with these settings, increase the vacuum level.
The vacuum level should be at the highest setting that is not painful.
If you are having pain while pumping at these settings, decrease the vacuum level until you are comfortable.
When you are done with pumping, you will feel empty. To read more about when to stop pumping, check out this article for in-depth information.
Pro Tip: When you are finished pumping, be sure to reduce the “Level” setting back to a low level, such as 1 or 2 before you shut off the pump. The Spectra will remember the level and cycle for your next session after the pump is turned off.
Pumping at a high level of suction at the end of your pumping session may have felt comfortable at that time.
But watch out, because it can be a painful surprise when you begin your next pumping session.
Turning the pump vacuum down to 1 or 2 will allow you to select the most comfortable level during your next session. (Trust me, I’ve made this mistake more than once!)
Frequently Asked Questions About The Spectra S1 and S2 Pumps
Here are the most common questions that come up about the Spectra S1 and S2 pumps.
- What does cycle mean on the Spectra?
- How long should you pump with a Spectra
- Can you pump into bags with a Spectra?
- How to double pump with a Spectra
- How to power pump with a Spectra
- How to check the hours on a Spectra pump
What Does Cycle Mean On The Spectra Pump?
Cycle is the number of times that the pump will simulate the speed of a baby’s suck. The number indicates the speed per minute. A higher cycle equals a faster pumping setting, and a lower cycle is a slower pumping setting.
The Spectra S1 and S2 have cycles of 70, 54, 50, 46, 42, and 38.
This means that the S1 and S2 pumps range anywhere from a fast pace of 70 cycles per minute to a slow pace of 38 cycles per minute.
A benefit to this cycle setting is that you can adjust the pumps to where you are most comfortable. It also means that you can adjust the pump and test different settings.
After trying a few different settings, you will know the ones that give you the most milk.
How Long Should You Pump With A Spectra S1 or S2?
You should pump until you feel empty. For most women, this will be anywhere from 15 to 25 minutes. Many women will have two or three letdowns during this timeframe.
It is important to fully empty when pumping so your body continues to produce a sufficient amount of milk.
Pump at least 15 to 25 minutes if you are exclusively pumping or pumping in place of a missed nursing session.
If you need to increase your milk supply, pump an extra 5 minutes.
Pumping for these extra 5 minutes after feeling empty will signal to your body that you need to produce more milk.
If you are pumping immediately after a nursing session, you may be able to pump for as little as 5 to 10 minutes. This is because your baby has already drained most of the milk.
Pumping immediately after nursing will signal your body to make more milk.
Can You Pump Into Bags With A Spectra?
Yes, it is possible to pump into bags with a Spectra. There are three options to do this. You can use an all-in-one system, a special adapter, or hack Medela flanges to work with the Spectra pump.
You can read more about these options in this article where I go in depth on pumping into storage bags.
My favorite way to pump into bags is to use this system It has a genius set up that really reduces cleaning time and saved my sanity while pumping.
The kit for the system comes with an adapter to pump into storage bags.
The second option is to use this adapter (link to Amazon).
The third option is to use Medela flanges with the Spectra pump. This article has all the details on how to hack Medela flanges and use them with the Spectra pump.
How To Double Pump With A Spectra S1 or S2
In order to double pump with a Spectra S1 or S2 pump, look for the small white cap where the tubing plugs into the pump. Remove the white cap. This will allow you to plug the second piece of the tubing into the pump.
Be sure to assemble all of the pieces of the pumping set, so you have two complete sets of pump parts.
When double-pumping, it is critical to have a good-quality hands-free bra.
The hands-free bra that I recommend can be slipped on over a nursing bra when you are ready to pump.
Once you are finished pumping, it is more comfortable to remove the pumping bra and wear your nursing bra. Check out the pumping bra at this link to Amazon.
How To Power Pump With A Spectra S1 or S2
In order to power pump with a Spectra S1 or S2, follow this process:
- Start pumping for 20-25 minutes, or until you are empty.
- Take a break from pumping for 10 minutes.
- Pump for 10 minutes.
- Take a second break for 10 minutes
- Pump for 10 minutes.
- Repeat the process 1 to 2 times per day for 7 days.
At the beginning of each round of pumping, start with the letdown (wavy line) button on the Spectra. Pump in letdown mode for at least 2 minutes, and then switch to expression mode.
If it is comfortable to pump in letdown mode for longer than 2 minutes, continue using that mode until you have a letdown.
During this hour-long pumping session, you may not get extra milk during the second and third pumps. That is what you would expect.
The point of pumping for these extra sessions is to signal to your body that you need to produce more milk.
The hormones that signal milk production work the best when your breasts are completely empty.
The more frequently you empty, the more milk you will make over time.
As you continue power pumping over the course of a week, you will see the amount of milk you pump each day increase.
Be sure to track the number of ounces or milliliters you pump for the entire day in order to see the increase.
For example, if you power pump during the evening, you may see the effect of an increase in milk production during your middle of the night pump.
Related: Power Pumping To Boost Milk Supply (& 3 Secret Tips)
How Many Hours Is A Spectra Pump Good For?
Spectra S1 and S2 pumps are good for 1500 hours according to the user manual. They both carry a manufacturer’s warranty of 2 years. It is a good idea to check the number of hours on the pump periodically.
How To Check The Hours on A Spectra Pump
Use this button sequence to figure out how many hours on a Spectra Pump.
- Power on
- Massage mode
- Cycle +
- Vacuum –
- Cycle –
- Vacuum +
- Massage mode
I found that it was really useful to know the hours on my pump. This helped me make sure that it was in good working order.
It is also useful to know the hours on the pump if you are finished using the pump and thinking about giving it to a friend.
If you are interested in donating or recycling your breast pump, check out this article I wrote with lots of useful information.
More Info on Spectra
I hope that this helped you begin to feel comfortable with your Spectra pump! By now you should understand how to assemble and use the pump.
If you are looking for more information on pumping, be sure to check out the articles below.
Breastfeeding & Pumping Tips
Follow PumpingMamas on Pinterest for more great pumping and breastfeeding tips!
Be sure to Save this article on Pinterest to your Baby or Breastfeeding board so you can find it later!
Must-Have Pumping Gear
Hear are a few of my favorite pumping items that made my life so much easier.
- This is the best pumping bra that is actually comfortable to wear all day long (the Sublime version). Use this link and code LisaW15 for a special discount on your purchase!
- Click here for the best deal on the WillowGo pump!
- This milk-boosting protein powder really helped out my milk supply. It is so delicious!
- These are the best baby bottle labels that will not wash off or wear off. The pineapple design and the whale design are two of my favorites.
- My favorite pumping bag that is roomy enough for my pump, a laptop, a cooler, and a lunch bag. They have so many cute colors and prints.
- These custom baby name onesies I found on Etsy are so adorable I ended up buying them in two different colors.
- I used this tiny mini fridge (link to Amazon) near my pumping station at home so I didn’t have to trek to the kitchen after a middle of the night pumping session.
- If you enjoyed this article, you can help support this blog by buying me a coffee here. Your support is very much appreciated!
Recommended Reading:
- 3 Genius Tips To Make a Spectra S2 Pump Portable
- 17 Best Pumping Tips For Beginners – helpful advice for new (and experienced) pumpers
- How To Pump Directly Into Storage Bags – includes my favorite tips and hacks for pumping into storage bags!
- Simple Medela To Spectra Hack – all the best tips for using Medela pump parts with a Spectra pump.


Freebies
I negotiated several discounts on pumping and breastfeeding items for all of you. Click here to check out all of the discounts from brands like the Willow breast pump, Kiinde, LaVie, Legendairy Milk supplements, and more!
I wanted to let you know about a deal I worked out for my readers. I have a discount code good for a FREE Kiinde Twist Starter Pack (just pay $6 shipping).
If you haven’t heard about Kiinde, it is an amazing system where you can securely pump directly into milk storage bags. Then, you feed your baby out of bottles that attach to these breastmilk storage bags.
The starter pack comes with:
- Adapters,
- A Kiinde bottle,
- Nipple,
- A Kiinde bag to test the system,
- An awesome coupon good for a free box of Kiinde bags, and
- Another coupon for 50% off their full gift set
Using this system was seriously one of my favorite pumping hacks!
HOORAY for saving time cleaning bottles and pump parts!!!!
You will need to use the special link below because this offer isn’t publicly available on their site.
Click here to go to Kiinde’s site and get your FREE Kiinde Starter Pack (worth $50)! You only need to pay $6 for shipping.
The SECOND FREEBIE I worked out for you is a discount code for a FREE nursing (or pumping) cover (just pay shipping).
Go to www.uddercovers.com and use the coupon code SMILE1 for a FREE nursing cover (worth $35)!
I have both the Kiinde system and nursing/pumping cover and love them. I hope you do too!

References:
http://www.nancymohrbacher.com/articles/2012/6/27/to-pump-more-milk-use-hands-on-pumping.html